Showing posts with label donna hay. Show all posts

Wednesday, June 15

rosewater & raspberry jam filled doughnuts


My current favourite breakfast involves a strong flat white and a doughnut. Don't judge me. If it's somewhat redeemable, both the coffee and doughnut come from one of my absolute favourite destinations: Brewbakers, an artisan bakery in Albion, Brisbane. These doughnuts are no ordinary doughnuts, nor do they involve smarty eyes and freddo frogs. They're made from a sourdough base, and filled with either homemade raspberry jam, custard, or chocolate.

Having only made doughnuts myself once before, the Autumn issue of Donna Hay was of course a good enough reason to be inspired to put my deep-frying goggles back on (jokes) and fry some more dough, if only to limit my Brewbaker treat consumption levels. I'd added some rosewater to a good quality store-bought raspberry jam, but of course homemade would taste worlds better. 


Ingredients
Recipe slightly modified from Autumn issue of Donna Hay

2 tsps active dry yeast
1 1/2 tbsps lukewarm water
1/2 cup lukewarm milk
2 tbsps caster sugar
50 gms butter
2 1/4 cups plain flour
2 eggs
vegetable oil, for deep frying

2 cups raspberry jam
rosewater, to taste
rose sugar and dried rose petals, for dusting


Place the yeast, water, milk and 1 tbsp of sugar in a large bowl and set aside in a warm place for 10 minutes or until bubbles appear on the surface. Add the butter, flour, eggs and remaining sugar to the yeast mixture and use a butter knife to mix until a sticky dough forms. Turn out onto a lightly floured surface and knead until smooth. 

Place the dough in a lightly oiled bowl, cover with a clean, damp cloth and set aside in a warm place until doubled in size (about 45 minutes).

Knead the dough on a lightly floured surface for 5 minutes or until smooth and elastic. Roll out to 1cm thick and using an 8cm round cutter, cut ten rounds from the dough. Place the rounds on a baking tray lined with baking paper and set aside for 30 minutes until risen. 

Place the oil in a large, deep saucepan over a medium heat, measuring temperature of oil with a sugar thermometer until it reaches 180C. Cook the doughnuts, in batches, for 1 - 2 minutes each side, or until golden. Drain on paper towel. 


In a small bowl, mix jam with 2 tsps rosewater. Taste, and add more if desired (which I did). Spoon jam into a piping bag fitted with a 0.5 - 1cm plain tip. Carefully pierce the doughnuts with a sharp knife, and then fill with jam. To ensure the jam reaches the middle of your doughnut, it's probably best to create this hole on the underside, which means you won't have a messy jam-hole showing like my doughnuts below. But, this is up to you. 

Dust doughnuts with rose-infused sugar, and top with dried rose petals, if you like.


The most wonderful thing about homemade doughnuts is the lack of sickly-sweetness that I associate with the store-bought variety. The recipe shows how little sugar is really involved, and you can then pump your doughnut with as much sugar as you like depending on the type of jam you use. The draw-back is their shelf life, as they demand to be eaten on the same day they're created. Though, I think this can always be easily arranged. 

Recommended baking soundtrack: Micah P. Hinson - Micah P. Hinson And The Pioneer Saboteurs.

Sunday, May 22

earl grey tea cake


I adore this time of year. With the change of weather, a clear day's sky actually looks blue, in comparison to the harsh bright white sky I squint through over the Summer months. I love being able to enjoy the Brisbane sun without the humidity. And with the mornings' temperature quite abruptly dropping, it's so easy for a simple cup of tea to seem to much better than I ever remembered. So as my tea consumption hits an all-year high, I of course need a new tea cake recipe to accompany my all-time favourite beverage.

Ingredients

1 cup chopped fresh dates
1 tsp bicarbonate of soda
3/4 cup freshly brewed earl grey tea
2 apples, peeled and grated
1 1/4 cups self raising flour, sifted
3/4 cup brown sugar
150 gms unsalted butter, melted
1/4 tsp ground vanilla bean (or 1 tsp vanilla extract)
4 eggs


Preheat oven to 160C. Grease and line a 10-cup capacity loaf tin with baking paper - I used a standard sized tin and four mini loaf tins.

Place the dates, tea and bicarb soda in a bowl and set aside for 10 minutes. Using a stick blender, blend the date mixture until smooth. Alternatively, process in a blender or food processor.


Place the apple, flour and sugar in a bowl and mix to combine. Add the butter, eggs, vanilla and date mixture and mix well to combine. Spoon into your loaf tin/s, and bake large loaf for 40 - 55 minutes (small loafs for 20 - 25 minutes) until cooked when tested with a skewer. Allow to cool in tin for ten minutes before turning out on a wire rack.


This is such an incredibly quick and easy recipe, and the result is perfect straight from the oven with (or without) a nice melty patch of butter, or even toasted until slightly crispy on the edges. I've since frozen the remains of this batch and look forward to getting a mini-loaf out of the freezer each day. It's also nice to have a tea-style loaf that isn't filled with banana, given their insane prices right now. 


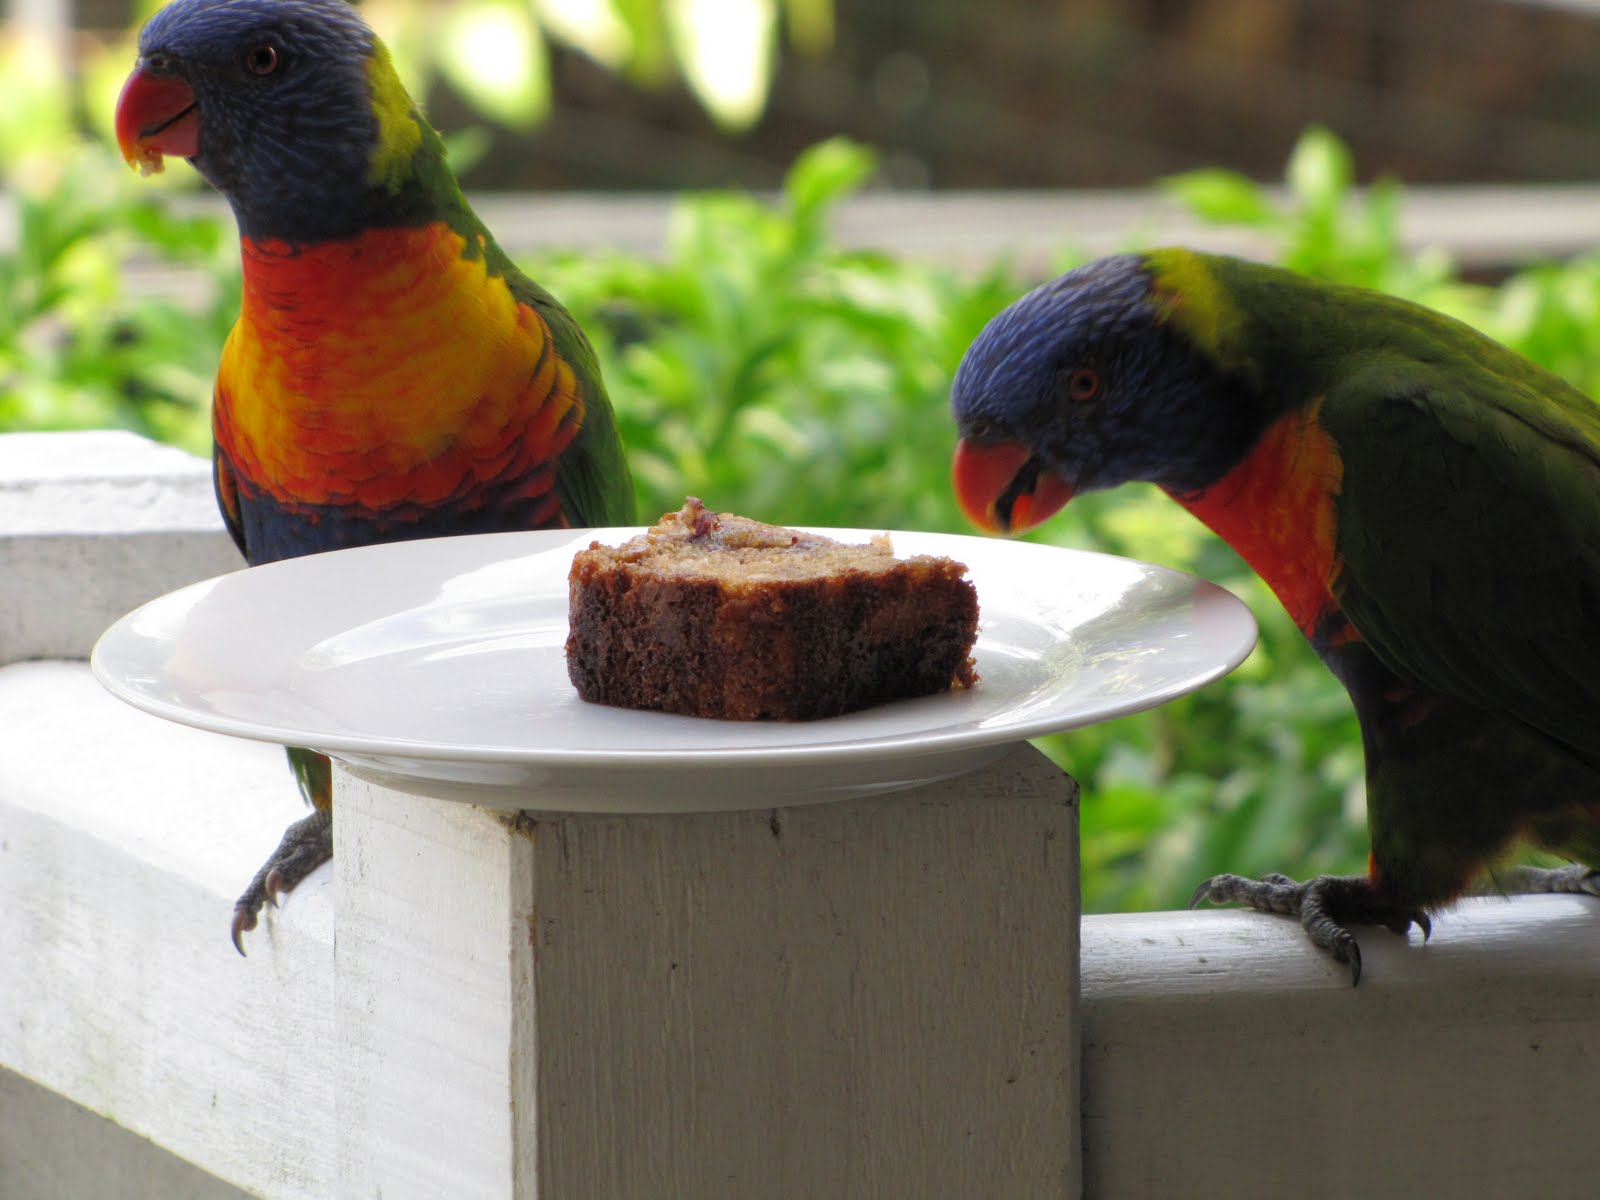
Even our neighbourhood birds enjoyed a slice or two. 


Recommended baking soundtrack: Okkervil River - The Stand Ins

Sunday, February 13

raspberry swirl marshmallows


Valentine's Day is made for not Hallmark, but to induce motivation to bake. Or make. Of all of the rubbish the Valnetine's Day bring out in people, isn't baking what it's all about? Putting time, effort and love into creating something tasty for someone you love: now tell me there's any better gift.

The first time I made marshmallows for Chockylit's s'mores cupcakes during the height of my love affair with the little cakes that have since taken over the world. The recipe was perfect, made me a lot of new friends, and also surprised me with the miracle of the marshmallow. How so few ingredients  could take on such a fluffy, sticky form only further increased my awe of sugar. This following recipe is not Chockylit's, but one from Donna Hay's Christmas section of her Dec/Jan 2011 issue. I simply Valentine's-ed it with a heart-shaped cutter.

Ingredients
Recipe from December/January issue Donna Hay

250 gms raspberries
1/2 cup icing sugar
1 1/2 tbsps gelatine powder
1/2 cup water
1 3/4 cups caster sugar
2/3 cup light corn syrup
1/4 cup water, extra

Lightly grease a 20cm x 30cm cake/slice tin and cover the base and longest sides with baking paper.

Place the berries and icing sugar in a small saucepan over medium heat. Using a fork, crush the berries and bring to the boil, stirring, for about 10 - 15 minutes or until thick and jammy. Remove from the heat and press through a sieve, discarding the seeds. Set aside.


Place the gelatine and water in the bowl of an electric mixer and stir to combine. Set aside for five minutes or until the water is absorbed. Make sure your mixer is fitted with the whisk attachment. Place the sugar, corn syrup and extra water in a saucepan over high heat and stir until the sugar has dissolved. Bring the mixture to the boil and continue to heat until it reaches 120C.

Start the motor on your electric mixer on a low speed, and slowly pour the hot syrup into the gelatine. Increase the speed and whisk for 4 - 6 minutes until the mixture is white and fluffy and beginning to cool - it's quite incredible to watch this happening!

Spread the marshmallow into the cake tin evenly with a spatula. Pour over the raspberry mixture and swirl with a metal skewer. Cover with plastic wrap and set aside at room temperature for four hours, or until set - this make take longer on a humid day. When set, remove from the tin and slice/cut into shapes - my heart cutter was about 4cm wide and the mixture yielded about 15 hearts. I find it easiest to cut if your knife/cutter is sprayed lightly with cooking spray.


You can keep these in an airtight container for a few days ad they'll be fine, just don't leave them in sunlight and ensure they don't end up in the fridge.

They would be adorable in smaller versions to top cupcakes or even ice cream sundaes.

Recommended baking soundtrack: Okkervil River - Down the River of Golden Dreams. 

Tuesday, October 26

honey & buttermilk panna cotta


As much as I love cookbooks, I adore cooking magazines - my absolute favourites being delicious, Australian Gourmet Traveller (if you hadn't already noticed), and Donna Hay. Having a collection of your own personal cookbooks is obviously a necessity, but there's just something about receiving a new, shiny collection of seasonal recipes every month that gets me excited like a five year old on Christmas morning. My boyfriend usually checks the mail, and after he hand delivers me a copy of my newly arrived subscription, my reading ritual is to rip the packet open and immediately flick through the pages, just once through. I "oooh" and I "aaaah" out loud, but then put it down. It's not until I have a cup of tea, and at least half an hour to myself that I sit down and pour over the recipes. Admittedly, some issues appeal to me more thank others, but there is always one or two recipes that simply scream "COOK ME, EAT ME!". In the October/November issue of Donna Hay, the recipes in the entire magazine were all fighting for my attentions.

Out of all of the Summery recipes, Donna Hay's recipe for honey & buttermilk panna cotta has won my heart for the most immediately appealing recipe, which brings me to my third honey recipe for the week. It is so incredibly simple and quick, perfect for a weeknight dessert. Or an any-night dessert, in fact. Just remember to factor in setting time, which is really quite quick.


I dedicate this post to my dear friend Chris as, for some unexplainable reason, panna cottas always remind me of him. So Chris: Get you blog up and running already, forgoodnesssake!


Ingredients (makes 4)
Recipe from Donna Hay

1 tsp gelatine powder
2 tbsps water
1 cup buttermilk
1 cup pouring cream
1/2 cup icing sugar
1 vanilla bean, split and seeds scraped
1 tbsp honey

Sprinkle gelatine over water in a bowl, then stir to combine. Set aside for 5 minutes until the gelatine is absorbed.

Place the buttermilk, cream, sugar and vanilla bean and seeds in a small saucepan over medium heat, and stir until the sugar has dissolved. Add the gelatine and cook, stirring for 2 - 3 minutes until the gelatine has dissolved. Strain and allow to cool completely.

Place 1 tsp honey in the bases of four 1/2 cup capacity glasses. Pour over the cooled cream mixture and refrigerate for at least two hours until set.

I love the texture buttermilk gives to cakes, but this was the first instance I'd used the gorgeous ingredient for anything unbaked. In this instance, it's perfect - the sticky sweetness of the honey lingering at the bottom of the glass is broken up perfectly by the tartness of the buttermilk.

As I previously mentioned, this is really quick recipe to whip up, which makes the final product even sweeter.


Recommended baking soundtrack: Horse Feathers - House With No Home.  

Thursday, October 21

oh, honey cupcakes with marshmallow icing


Lately, wherever I look I seem to find dreamy, honey inspired sweets. Naomi from hello naomi recently created an absolutely stunning bee hive cake. Linda from Bubble and Sweet made some busy bee cookies, topped with wonderful little bumble bees. And now, Donna Hay's October/November issue is filled with honey inspired desserts, including cookies, panna cotta and bundt cakes. I want in on this action.

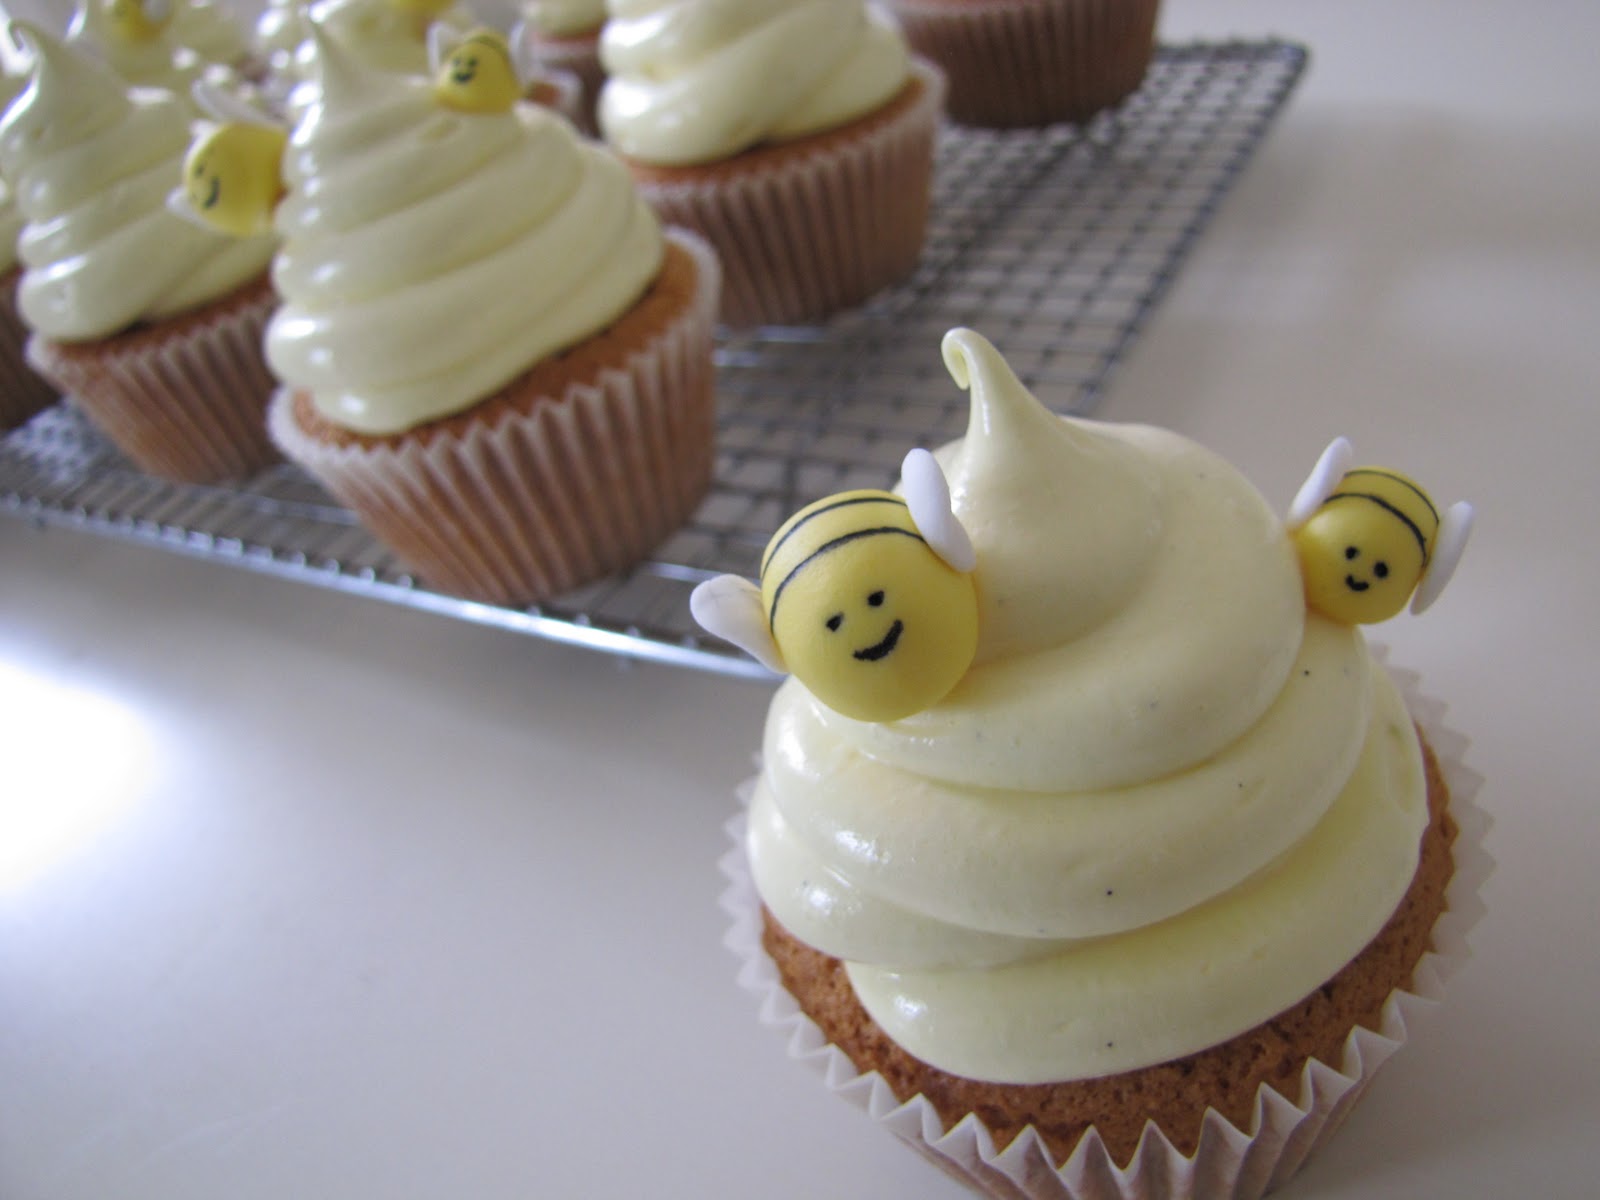
I've used a beautiful honey cake recipe to make cupcakes topped with a fluffy, light vanilla marshmallow frosting. I credit my bees to Linda at Bubble and Sweet, though hers are much more inspirational! Don't be put off by the extra work - they are fiddly but so simple, and add so much to the otherwise rather plain looking cupcake.

Ingredients (makes 15)
For cakes:
200 gms unsalted butter, softened
185 gms soft brown sugar
3 eggs
1/3 cup honey, warmed
280 gms self raising flour

For icing:
3 egg whites
1 1/2 cups white sugar
2 tsps glucose syrup
pinch of cream of tartar
1 tsp vanilla bean paste
dash of yellow food colouring

For decorating:
200 gms fondant
yellow food colouring
black food colouring


For the cakes, preheat your oven to 180C. Line two standard muffin tins with 15 paper cases.
Beat the butter and brown sugar until light and cream. Add eggs, one at a time, and beat well after each addition. Fold in the honey and flour until combined. The mixture should be beautiful and creamy.

Divide the mixture among 15 cases and bake for 20 minutes until lightly golden. Transfer to a wire rack immediately and cool completely.

Meanwhile, for your bumble bees, tint roughly 180 gms of fondant yellow to make the bee-bodies. Roll small balls into oval shapes at your desired size. My bees are about 1 - 1.5 cms and this quantity of fondant made about 30 bees. Using either a fine paintbrush or a toothpick, paint stripes, eyes and a smiling mouth on each of your bees. Allow to dry. Using the remaining uncoloured fondant, squish small amounts to form wing shapes. Press two wings onto each bee, using a little water to secure if necessary. Set bees aside to dry and firm up slightly.

The make the marshmallow icing, combine the egg whites, sugar, corn syrup, cream of tartar and 100 mls water in a heatproof bowl (preferably the bowl of your electric mixer to save on washing up). Sit the bowl over a saucepan of simmering water, and whisk quite vigorously for five minutes until mixture is light and foamy. Alternatively, if you you have handheld beaters, you could use these - it will save you time and sweat! Remove from heat. Add vanilla and beat with electric mixers on a high speed until stiff peaks form. Add the food colouring until the desired strength of yellow and beat until just combined.

Generously pipe fluffy icing onto each cake using a plain 1cm tip. Top with a bumble bee. I find it better to secure bees with a toothpick, pierced through the the cake, but this is not necessary.

These cakes were a huge hit at work today, with all 16 being scooped up before I left for the night. Perhaps next time I'll fill them with creamed honey, or even a honey infused custard. Custard makes everything better.


Stay tuned for more honey inspired recipes over the weekend!

Recommended baking soundtrack: Ola Podrida - Belly of the Lion.