Showing posts with label cake. Show all posts
Wednesday, July 27
happy belated birthday, heidi!
About two weeks ago, my dear sister turned thirty, and all has been a blur before, during and after. Choosing a loved one's birthday cake is always something I will start months in advance. I will search for a recipe or flavour combination almost as early as the day following their birthday the previous year. I'll decide upon a favourite, and then change my mind, and then lose a recipe or two until I settle on something I hope will be perfect, and that they will love. But, it's always particularly difficult choosing a cake to make my sister, and certainly not because she's fussy-- her and I definitely share our love of all things sweet and cakey. But each year, the cakes we make for each other have to be bigger and grander than the last. Two years ago, my sister made me a Cherry Ripe mudcake that weighed more than my cat. Last year, I made her a six layer black forest cake. I imagine (and hope) this will continue until forever.
This year, it may seem as though I've toned it down a little, but when I saw Sweetapolita's neapolitan cake, I knew I'd found 'the one'. This cake is made from chocolate, strawberry and almond-y vanilla layers, and was big enough to feed all our friends and family. In my haste to get this cake finished, and in the excitement of my sister's birthday dinner, I took no real photos of the cake, much to my disappointment. So, since then I have re-created miniature versions for photographic and eating purposes. Okay, mostly for eating.
Each cake was beautiful and moist, and sandwiching them with some homemade strawberry jam was all they needed. The buttercream has strawberry extract and pure cream, which gives it a taste surprisingly close to old-fashioned strawberry ice cream. Please see Sweetapolita's blog for so many more perfect recipes accompanied by magnificent photography. But be warned: you will feel inspired to bake absolutely every recipe within.
Recommended baking soundtrack: Tallest Man on Earth - Shallow Graves.
Sunday, May 22
earl grey tea cake
I adore this time of year. With the change of weather, a clear day's sky actually looks blue, in comparison to the harsh bright white sky I squint through over the Summer months. I love being able to enjoy the Brisbane sun without the humidity. And with the mornings' temperature quite abruptly dropping, it's so easy for a simple cup of tea to seem to much better than I ever remembered. So as my tea consumption hits an all-year high, I of course need a new tea cake recipe to accompany my all-time favourite beverage.
Ingredients
1 cup chopped fresh dates
1 tsp bicarbonate of soda
3/4 cup freshly brewed earl grey tea
2 apples, peeled and grated
1 1/4 cups self raising flour, sifted
3/4 cup brown sugar
150 gms unsalted butter, melted
1/4 tsp ground vanilla bean (or 1 tsp vanilla extract)
4 eggs
Preheat oven to 160C. Grease and line a 10-cup capacity loaf tin with baking paper - I used a standard sized tin and four mini loaf tins.
Place the dates, tea and bicarb soda in a bowl and set aside for 10 minutes. Using a stick blender, blend the date mixture until smooth. Alternatively, process in a blender or food processor.
Place the apple, flour and sugar in a bowl and mix to combine. Add the butter, eggs, vanilla and date mixture and mix well to combine. Spoon into your loaf tin/s, and bake large loaf for 40 - 55 minutes (small loafs for 20 - 25 minutes) until cooked when tested with a skewer. Allow to cool in tin for ten minutes before turning out on a wire rack.
This is such an incredibly quick and easy recipe, and the result is perfect straight from the oven with (or without) a nice melty patch of butter, or even toasted until slightly crispy on the edges. I've since frozen the remains of this batch and look forward to getting a mini-loaf out of the freezer each day. It's also nice to have a tea-style loaf that isn't filled with banana, given their insane prices right now.
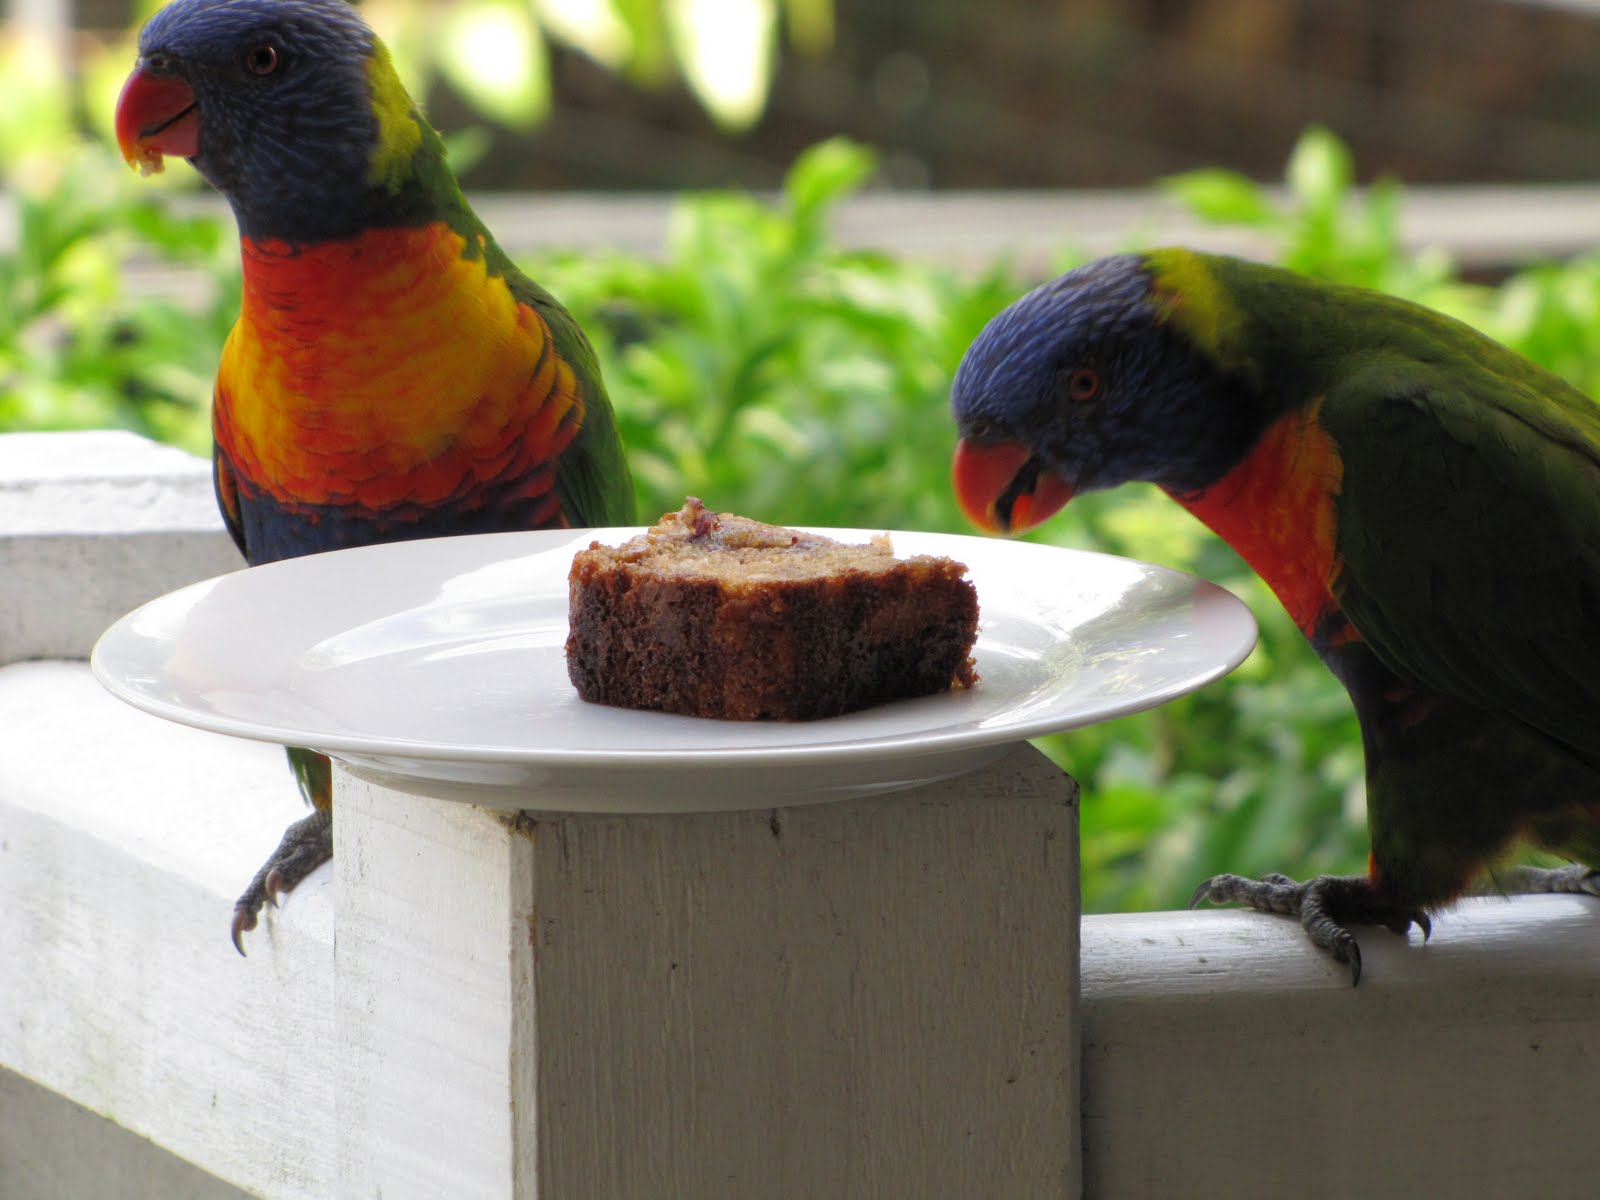
Even our neighbourhood birds enjoyed a slice or two.
Recommended baking soundtrack: Okkervil River - The Stand Ins.
Monday, April 25
happy easter, internet
Yesterday I was lucky enough to celebrate Easter Sunday with my family - including my adorable almost-six-month-old nephew - and share this four-tiered creamed honey cake with them. Despite not being able to consume cake, said nephew did have his first taste of chocolate custard. Don't worry Xander, there'll be plenty more opportunities for cake...
Surprisingly, I am yet to overdose on chocolate, but I still have three two more days to accomplish that feat.
I hope anyone reading has had a delightful Easter break so far.
Friday, April 22
chocolate buttermilk easter cake
So, wanting to make an Easter present for my co-workers, I drew ideas from both Donna Hay, and a more recent source of inspiration: Tracey Lau. Check out her blog for some absolutely wondrous photography and recipes. This cake is everything Easter is about: equal portions of cuteness and over-consumption of chocolate. My Easter baking may have come a little late, but it has arrived with great force, and I was simply smitten with the results. Isn't this the way baking should always be?
Ingredients (makes a four-tiered cake)
For cakes:
For cakes:
Recipe from Donna Hay
1 cup water
120 gms butter, chopped
4 tablespoons cocoa, sifted
2 cups plain flour, sifted
1 tsp bicarbonate of (baking) soda, sifted
2 cups caster sugar
2 eggs
1/2 cup buttermilk
1/2 tsp ground vanilla bean
Preheat oven to 150C.
For the cakes, place the water, butter and cocoa in a saucepan over medium heat and stir until the butter has melted. Place the flour, bicarbonate of soda and sugar in a bowl, add the cocoa mixture and whisk to combine. Add the eggs, buttermilk and vanilla and whisk to combine.
Divide mixture between 4 lightly greased 20cm round cake tins lined with non-stick baking paper. Bake for 40 minutes or until cooked when tested with a skewer. Allow to cool in the tins for 5 minutes. Turn out onto wire racks to cool completely. Stack two cooled cakes on top of eachother (with baking paper in between each layer to prevent sticking) and with a small, sharp knife, cut a semi-circular hole (about 3 cms deep and 7cm wide) into the cakes - this will form the burrow for your Easter bunny. Refrigerate until needed.
For the cream cheese filling, place the butter and cheese in the bowl of an electric mixer and beat for 6 - 8 minutes or until pale and creamy. Add the icing sugar and cocoa and beat for a further 6 - 8 minutes or until light and fluffy. To assemble, place bottom layer (the layer that has the base of the already cut burrow) on a serving plate and thinly spread with one quarter of the frosting. Repeat with remaining layers, then use any left over frosting to fill in gaps between layers. Refrigerate for an hour.
1 cup water
120 gms butter, chopped
4 tablespoons cocoa, sifted
2 cups plain flour, sifted
1 tsp bicarbonate of (baking) soda, sifted
2 cups caster sugar
2 eggs
1/2 cup buttermilk
1/2 tsp ground vanilla bean
For filling:
50 gms butter, at room temperature
250 gms cream cheese
1 cup icing sugar, sifted
1/4 cup cocoa, sifted
50 gms butter, at room temperature
250 gms cream cheese
1 cup icing sugar, sifted
1/4 cup cocoa, sifted
For chocolate buttercream:
500 gms butter, at room temperature
1/2 cup cocoa
2 cups icing sugar
To decorate:
350 gms fondant
Desired food colourings and sugar decorations
For your decorations, form two-thirds of the fondant into a large ball to form your rabbit's bottom, then make a small ball for it's tail. Create two rabbit feet, using a scalpel or small knife to create his toes. Colour a small amount of remaining fondant grey - form shapes for your rabbit's feet pads. Colour remaining fondant green and slice into grass blades or various lengths and widths. Allow to dry on a sheet of baking paper.
For the cakes, place the water, butter and cocoa in a saucepan over medium heat and stir until the butter has melted. Place the flour, bicarbonate of soda and sugar in a bowl, add the cocoa mixture and whisk to combine. Add the eggs, buttermilk and vanilla and whisk to combine.
Divide mixture between 4 lightly greased 20cm round cake tins lined with non-stick baking paper. Bake for 40 minutes or until cooked when tested with a skewer. Allow to cool in the tins for 5 minutes. Turn out onto wire racks to cool completely. Stack two cooled cakes on top of eachother (with baking paper in between each layer to prevent sticking) and with a small, sharp knife, cut a semi-circular hole (about 3 cms deep and 7cm wide) into the cakes - this will form the burrow for your Easter bunny. Refrigerate until needed.
For the cream cheese filling, place the butter and cheese in the bowl of an electric mixer and beat for 6 - 8 minutes or until pale and creamy. Add the icing sugar and cocoa and beat for a further 6 - 8 minutes or until light and fluffy. To assemble, place bottom layer (the layer that has the base of the already cut burrow) on a serving plate and thinly spread with one quarter of the frosting. Repeat with remaining layers, then use any left over frosting to fill in gaps between layers. Refrigerate for an hour.
For chocolate buttercream, beat butter in the bowl of an electric mixer until smooth and pale. Add cocoa and beat until combined. With motor running on a low speed, gradually add icing sugar, increasing speed to high between additions. Stop when mixture is light and fluffy, but holds it's shape - you may not need all of the icing sugar.
Remove cake from fridge and very cover very thinly in a layer of buttercream. Chill for 30 minutes.
Once crumb coat of buttercream has cooled, coat cake and burrow liberally with buttercream - you can be messy with this part. Vertical strokes will make it look more tree-like, and remember to add rings to the top of the tree stump. Add roots around the base of tree. Insert bunny into the burrow, adding his tail and feet, using a paintbrush dipped in water to secure. Decorate tree with grass, flowers and Easter eggs as you like.
Standing over twenty centimeters tall, this proud, four-tiered chocolate cake means business, was incredibly heavy and could serve twenty, quite honestly. But the cake itself is lovely and moist, not overly sweet, and stores incredibly well. I made my cakes a few days in advance and kept them in the fridge for three days before decorating: you would never have known.
The original cake recipe called for two 12cm split cakes, resulting in a much smaller four tiered cake, but I have doubled all quantities. If you don't have an army of grateful coworkers or family members to consume your gorgeous cake, maybe scale it down a little. Or go overboard. It is Easter.
Have a lovely break, readers.
Recommended baking soundtrack: Sea Wolf - Leaves in the River.
Sunday, March 27
jasmine & citrus pound cake
This following recipe is taken from a glorious book filled with recipes to accompany tea and that incorporate tea. I love tea infused cakes, as you may have guessed from my gushing over lady grey madeleines.
Ingredients
Recipe from Tea: More than 80 Delicious Recipes
For cake:
1/2 cup milk
1 tsp loose jasmine tea
4 eggs
1 3/4 cup sugar
1/2 tsp salt
1/4 cup pouring cream
2 tsps finely grated lemon zest
2 tsps finely grated orange zest
2 3/4 cups plain flour
1 1/4 tsp baking powder
1/2 cup butter, melted
1/4 cup freshly squeezed orange juice
For jasmine ganache:
1/2 cup thickened cream
2 tsps loose jasmine tea
100 gms white chocolate (chips or finely chopped, good quality pls!)
1 1/2 cups pure icing sugar
1 tbsp finely grated orange zest
Preheat oven to 180C. Lightly grease and line a 21cm round cake pan.
In a small saucepan, heat milk until just below boiling over medium heat. Remove from heat, add tea leaves and cover, allowing to steep for about 8 minutes. Strain into a heatproof bowl and set aside.
In the bowl of an electric mixer, beat eggs until fluffy. Gradually beat in sugar and salt. Add cream, milk and zests and stir to combine. Gradually add flour and baking powder while mixing on a low speed. Add butter and stir to combine.
Pour mixture into prepared tin and bake for 60 - 70 minutes, or until a skewer inserted into the middle of the cake comes out clean. While hot, prick the top of the cake with skewer and brush with orange juice. Allow cake to cool completely in the tin before transferring to a serving plate.
For white chocolate ganache, in a small saucepan over medium heat, bring cream to just below boiling point. Remove from heat, add tea leaves, and cover, allowing to steep for eight minutes. Strain cream into a large heatproof bowl. Whisk in white chocolate, icing sugar and orange zest. Chill for at least fifteen minutes until at spreading consistency. Spread ganache generously onto cake - I had enough to cover both top and sides. Smooth with a knife dipped in boiling water, if necessary.
I recommend keeping this cake at room temperature as much as possible - the pound cake can get a little too firm and heavy straight from the fridge. And please, whatever you do, don't skip out on the icing in this recipe. It is simply gorgeous, and without it I don't think the jasmine flavour would be anywhere near as noticeable. I'll definitely be trying this recipe with some rose black tea.
Recommended baking soundtrack - Pepper Rabbit - Beuregard.
Thursday, March 17
chocolate guinness cake
It's far too rare that I make a simple melt and mix cake and there really is no good recent as to why. There's something about simple cake recipes that makes the result even more rewarding, especially when it's as satisfying as this cake - aesthetically and otherwise. It's as though throwing everything together one morning before work and slapping on a bit of icing without barely dirtying a bowl lowers ones expectations. I would never dare doubt a Nigella recipe, especially after stumbling across others' reviews post-tasting, but I was a little wary of the unfamiliar.
If it weren't for a hefty cooking time and the necessity to cool this cake completely before removing from the tin (and it really is a necessity - this baby is dense), this cake could be created in mere moments. Despite being unlikely to require any further convincing, I believe this to be one of the best chocolate cakes I've made, perhaps polling second position behind Bourke St Bakery's flourless variety. Tall, dark and handsome, this cake also manages to be strangely light and although it contains only cocoa and no chocolate, it's gorgeously chocolate-y. And like Nigella describes so perfectly, the stout gives it a warmness and tanginess that's similar to gingerbread, only without the spices.
Ingredients
For the cake:
250 mls Guinness
250 gms unsalted butter
75 gms cocoa
400 gms caster sugar
140 mls pot sour cream
2 eggs
1 tablespoon vanilla bean paste
275 gms plain flour
2 1/2 tsps bicarbonate of soda
For the frosting:
300 gms cream cheese
150 gms icing sugar
125 mls pouring creamPreheat the oven to 180°C, and butter and line a 23cm springform tin.
Pour the Guinness into a large wide saucepan, add the butter and heat until the butter's melted. Whisk in the cocoa and sugar. Beat the sour cream, eggs and vanilla until combined, and then add to beer mixture. Whisk in flour and bicarb soda.
For the frosting, lightly whip the cream cheese until smooth. Add the sifted icing sugar and beat to combine. Add the cream and beat again until fluffy and light, and at spreadable consistency. Generously spread frosting onto cake.
Ingredients
Recipe from Nigella Lawson
For the cake:
250 mls Guinness
250 gms unsalted butter
75 gms cocoa
400 gms caster sugar
140 mls pot sour cream
2 eggs
1 tablespoon vanilla bean paste
275 gms plain flour
2 1/2 tsps bicarbonate of soda
For the frosting:
300 gms cream cheese
150 gms icing sugar
125 mls pouring cream
Pour the Guinness into a large wide saucepan, add the butter and heat until the butter's melted. Whisk in the cocoa and sugar. Beat the sour cream, eggs and vanilla until combined, and then add to beer mixture. Whisk in flour and bicarb soda.
Pour the cake batter into the greased and lined tin and bake for 45 minutes to an hour. Leave to cool completely in the tin on a cooling rack.
For the frosting, lightly whip the cream cheese until smooth. Add the sifted icing sugar and beat to combine. Add the cream and beat again until fluffy and light, and at spreadable consistency. Generously spread frosting onto cake.
My coworkers were the first to sample this cake, and despite them being kind with all of my creations, this seems to be a new favourite. Labeling it a very "adult" cake, it's best recommended with a strong coffee and a glass of port.
Recommended baking soundtrack: The Smiths - s/t.
Tuesday, January 18
rhubarb & rosewater upside down cake
I have a new mistress. Anybody who stumbled across the December issue of Cuisine would understand. On its glossy cover was a ring shaped pavlova decorated to look like a Christmas wreath, covered in berries, cherries and "holly" leaves. After making it for my family's Christmas dinner, I was officially smitten.
Cuisine is like delicious magazine's mysterious, foreign cousin: The styling is just as gorgeous and the recipes equally as accessible, but there are also teasing reviews of New Zealand restaurants and bars and some unattainable brands not available in Australian delis. This could get frustrating, but it just adds to the allure in an always-want-what-you-can't-have kinda way. I still adore you, AGT and delicious. I just... need something difference every once in a while.
Ingredients
Recipe from September 2010 issue Cuisine
For rhubarb:
4 stems rhubarb
25 gms butter
25 gms caster sugar
For cake:
100 gms unsalted butter, at room temperature
150 gms caster sugar
1 tsp vanilla extract
2 eggs, separated
150 gms plain flour
1 1/2 tsp baking powder
125 mls milk
For the syrup:
150 gms caster sugar
150 mls water
1 rhubarb stem, chopped
1 tbsp rosewater
juice 1/2 lemon
Line the base of a 20cm springform cake tin with baking paper, and grease with butter. Preheat oven to 180C.
Cut the rhubarb on the diagonal into 3cm thick slices and set aside. In a small saucepan, gently heat the butter and caster sugar until the mixture begins to caramelise. Pour into the base of the tin. Arrange the rhubarb in the base and set aside.
Bake for 40 - 50 minutes until cake is firm to the touch. While I didn't have any syrupy rhubarb drips, it's advised to bake with a tray in the bottom of your oven just incase - things could get sticky!
Allow to cool slightly in the tin while making the syrup.
Heat the sugar and water in a small saucepan until sugar has dissolved. Add the rhubarb and cook for five minutes - the syrup should be rosy in colour. Strain through a sieve and stir through rosewater and lemon juice.
Remove the cake from the tin, firstly running a bread and butter knife around the edges. Invert onto a serving plate. Smother each slice with rosewater syrup and serve with cream.
It's recommended that this cake is best eaten on the day of baking while the syrup is still warm, but honestly, it tastes just as wonderful the following day. Just be aware that the rosy rhubarb will eventually fade to a yellow. The cake is wonderfully light because of the egg whites, yet still has a pudding-esque texture when warm. This is an important quality for me. Would taste exquisite with custard.
Recommended baking soundtrack: Fruit Bats - The Ruminant Band.
Monday, January 3
chocolate & mint whoopie pies
Baking trends are a funny thing. To make cupcakes ten years ago involved a vanilla cake with buttercream, possibly including coloured sprinkles for those feeling adventurous. Few people had tasted proper French-style macarons let alone churned them out of their own home kitchen. And now, the whoopie pie. Ah, the whoopie pie... I'm not sure if this delightful cake-biscuit hybrid (also known as moon pie) has hit Australia with as much momentum as cupcakes, macarons or cake (or cookie!) pops, but there's certainly no reason why it shouldn't, especially with books out there whose sole purpose it is to teach us the very basic tricks to the perfect whoopie.
I've been put off making whoopie pies for a while now, simply because I was convinced I would eventually stumble across the marshmallow fluff suggested to make the perfect filling. This obviously didn't happen, and here I was months later, whoopie-less. Buttercream is a possibility, but just doesn't quite fit. Melting marshmallows with cream works, but just isn't the same. But! The closest and possibly even better filling is one of my favourite frostings: a marshmallow frosting that holds its shape and is very easy to inject flavour into. Of course, I chose peppermint.
One last thing before the recipe: I know vegetable shortening (Copha is perfect) seems like a funny addition to a cake that already contains butter, but it really adds lightness to the cake and makes it incredibly soft. It also helps avoid your whoopies having cracked surfaces. So please, trust the recipe.
Ingredients (makes approximately 24 whoopie pies)
Recipe adapted from Whoopie Pies: Dozens of Mix 'em, Match 'em, Eat 'em Up Recipes
For whoopies:
1 2/3 cups plain flour
2/3 cocoa powder
1 1/2 tsp baking soda
1/2 tsp salt
55 gms unsalted butter, at room temperature
55 gms vegetable shortening
1 cup dark brown sugar, firmly packed
1 egg
1 tsp vanilla bean paste
1 cup full-fat milk
For marshmallow filling:
3 egg whites
1 1/2 cups white sugar
2 tsps glucose syrup
pinch of cream of tartar
2 tsps peppermint essence, or to taste
To make the whoopies (cakes), preheat oven to 190C. Line two baking sheets with baking paper.
Sift together the flour, cocoa powder, baking soda and salt. In the bowl of an electric mixer fitted with the paddle attachment, beat butter, shortening and brown sugar on a low speed until combined, then increase speed to medium and beat until light and fluffy - which will take at least three minutes. Add the egg and vanilla, and beat for a further two minutes until fully incorporated.
Add half the flour mixture and half the milk to the batter, beating on a low speed until just combined. Scrape down the sides of the bowl, and add remaining flour mixture and milk, beating until smooth and creamy.
Drop 1tbsp quantities of batter onto baking trays, leaving about 5cm between each whoopie, as they will spread when cooking - you will obviously need to do multiple batches, so be generous and give your first lot of whoopies (I just love saying whoopies!) lots of space to grow during the first time around. You can always squash them together a little more after some experience. Bake for ten minutes - one sheet at a time - for about ten minutes. The pies should spring back when pressed gently, like any sponge. Remove from the oven and let them cool on the baking sheet for about five minutes before transferring to a wire rack to cool completely before filling.
For the marshmallow filling, combine the egg whites, sugar, corn syrup, cream of tartar and 100 mls water in a heatproof bowl (preferably the bowl of your electric mixer to save on washing up). Sit the bowl over a saucepan of simmering water, and whisk quite vigorously for five minutes until mixture is light and foamy-- this will feel like a very long five minutes! Alternatively, if you you have handheld beaters, you could use these - it will save you time and sweat. Remove from heat. Add peppermint and beat with electric mixers on a high speed until stiff peaks form.
Generously pipe, spread or dollop marshmallow filling onto half of the whoopies. Allow to set for five to ten minutes before sandwiching them with the remaining whoopies. This will allow the filling to set slightly. Eat & enjoy.
These can be tricky to store, as the cake becomes very sticky quite quickly. It is suggested they are eaten on the same day as being made, but I consumed one the day after and thought they tasted even better. Just make sure you don't stack them if you can help it, and if you can't, place a layer of baking paper in between to prevent them from sticking to one another.
Recommended baking soundtrack: Built to Spill - There Is No Enemy.

Subscribe to:
Posts (Atom)